Alexander
Last Update 7 months ago
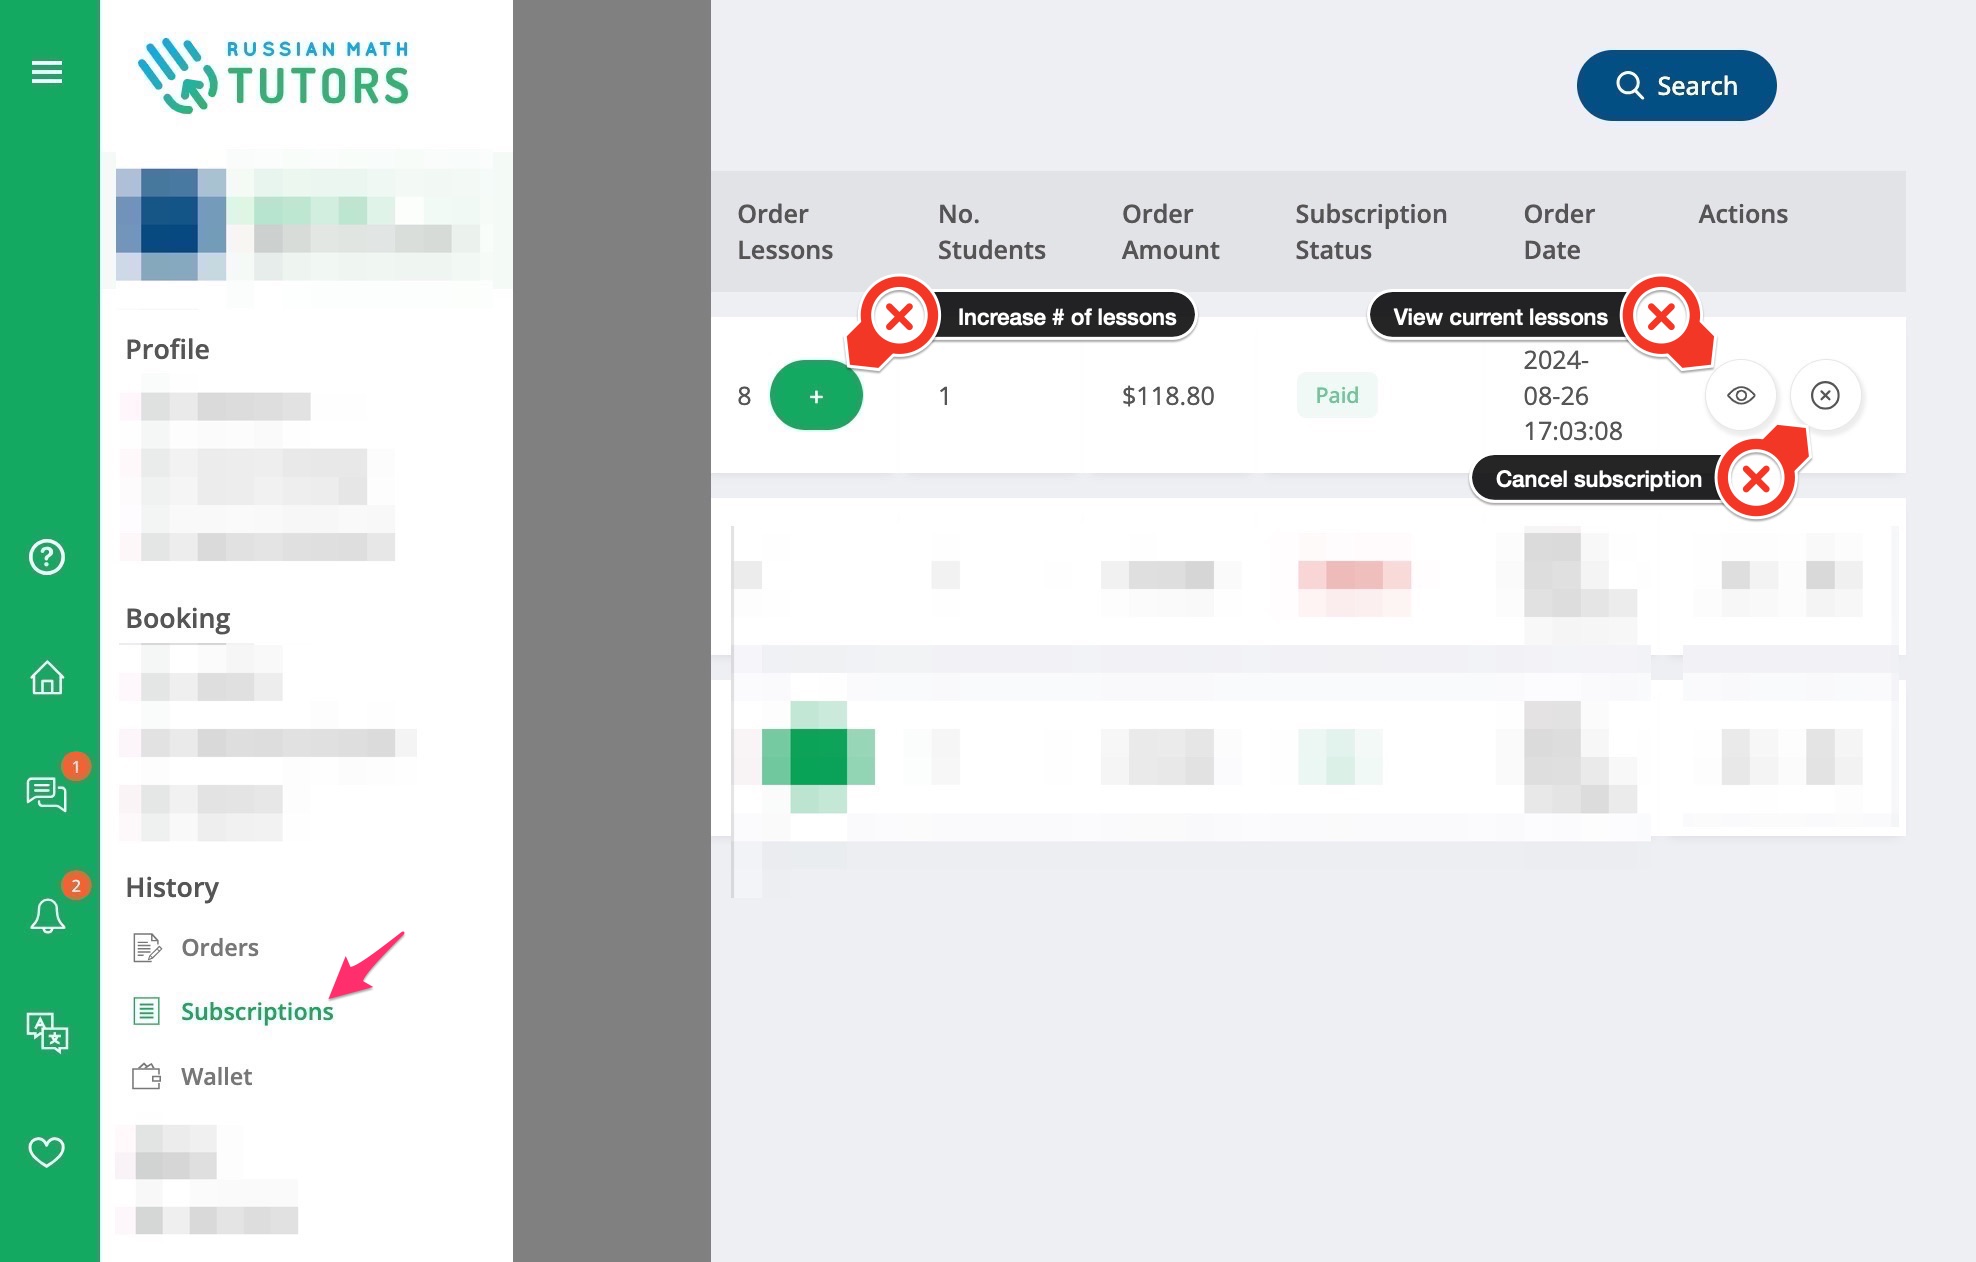
All subscriptions can be managed in the Subscriptions screen, easily accessible from the Dashboard Menu. Use this screen to:
- Increase the number of lessons in a subscription (number of lessons can only be increased, not reduced).
- Cancel the subscription by clicking the circular button with an x in the middle.
- Navigate to the lessons screen to view all the lessons for a given subscription.
Subscriptions will be automatically added to this list when the student pays with a PayPal, Credit Card (Stripe) by checking the Subscriptions checkbox on the 4th Payment Wizard Screen. Any subscription can be canceled by the student from the Subscription Management screen (above). Once a subscription is canceled, it cannot be reactivated. Only a new subscription can be created by making a new payment.
Note that once a subsription is canceled, new (current) prices will be applied on any new subscription or order and the 10% discount will no longer apply. Therefore, it is imperative that you carefully consider these repercussions when canceling a subscription.
Subscriptions provide convenience through automatic recurring payments, ensuring your student never runs out of lessons and your teacher relationship continues uninterrupted. The platform charges your payment method at the interval you selected during setup, automatically adding the specified number of lessons to your account each billing cycle. You can view the next billing date and amount directly on the Subscriptions screen. If you need more lessons before the next billing cycle, use the increase function to add lessons immediately while keeping your recurring subscription active at its current rate and discount level.
🤝 Need Additional Support?
Our comprehensive help documentation and support team are here to assist you.